
Remove Image Backgrounds Using Paint in PowerPoint – An Outdated Update

The traditional methods of removing backgrounds of images in PowerPoint 2007 version have become obsolete now with the advent of the innovative background removal tool in the 2010 version. But since what the proverb reminds us is being late is better than being never’, I decided to post a small tip, using which we can make the background removal in 2007 version a little bit finer with the application of MS Paint.

We know two methods of background removing in PowerPoint 2007. In the first method, we draw an outline of the main object in our image using freeform shape and fill the shape using the picture or texture fill option. In the second method, we draw outlines of the background areas of the image using free form tool, give same colour to all shapes, and after making the entire group into a PNG image remove the background portions using set transparaent colour option. But while using this second method, many of you might have found the light outline of the shapes as a disturbnace. In this small tip, let me tell you how to make these images into spotless ones.

See the demonstration below:

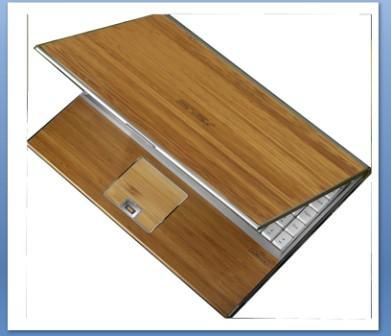
We have this image of a laptop, and the screesnhots of the known procedure is seen below:


Once we remove the blue coloured area using set transparency option, we can see the light edges of the shapes around the image.


To remove it, copy the image and paste into MS Paint


In the selection tool button, select the free form selection option.


Now, select the object as precisely as possible excluding the disturtbing outlines.


Now, the image is separated from the light edges.


Copy it and paste back to the PowerPoint and using the set transparent option in the recolour button, remove the white background easily.


Using the same feature in MS Paint we can remove the background of an image if we want only a rough cut. See the example of the image of a kitten posted below.


In Paint, using the freeform selection tool, make a rough selection of the object in the image.


Copy the selected image and post it in PowerPoint.


Using the set transparency option, remove the white background. (If your image has white coloured portions, be sure to fill the background area in MS Paint with any other colour so that it won’t affect the clarity of image when we later remove the background area using set transparency option).

Using the soft edges tool, and shadow option in PowerPoint, we can beautify the image a little more.


Comments

Unknown said…
This is really amazing post and i am using the most super fast and cheap deep etching, clipping path services, image background remover editor online for add a magic into my pictures.
Jogesh debnath said…
This comment has been removed by the author.
Hallebose said…
Backgrounds are useful space

Popular posts from this blog

Introduction to Elearning

Did you ever wonder about the difficulties of effectively instructing the tech illiterates on certain how-to-do’s? Even in the case of filling some online forms also, you might have come across people with trouble in grasping the ‘seemingly sophisticated’ procedures and steps. Then what about senior persons who are trying to learn a new thing, say a language? A teacher or a professor has certain limitations in this aspect. Despite of class room teaching, we need some advanced tools to plant ideas into the minds of the aforementioned group of learners. An approach that incorporates technology and creativity equally can do wonders in this new-generation method of learning. This new method of learning may generally be called elearning. Coming to the terminology, you might have noticed the spelling of the name given to this new learning system. Well, 'elearning' is a neologism, which is nowadays being commonly used by the techies around the globe. The word is derived from ‘electro...

Conclude Your E-Learning Modules with a Shrinking Cinematic Effect

Hey! And I am back, and this time with a simple PowerPoint effect created based on the basic animations. I think this effect can be used as an alternative method to end your e-learning tutorials with a cinematic effect while scrolling up the credit lines. The below screenr will show you the Shrinking Cinematic Effect and the steps which I used to create the effect. If you find my awkward pronunciation difficult to follow, scroll down this page further, and you will see the steps in written format with additional images.  In these following steps, I am showing you a different example. If it was Pierce Brosnan who appeared in my Screenr video, now it is the turn of Tom and Jerry. Step 1: You have the image of Tom & Jerry placed in a PowerPoint slide covering entirely the slide area. In this example, I have changed the slide background colour into black. Step 2: Copy the image, place it exactly on top of the first imag...